Top Tips for Installing a Mid-Dress Crate Engine
1. Preparation is Key
- Inspect All Components: Before installation, carefully inspect the engine and components for any shipping damage or loose parts.
- Gather the Right Tools: Ensure you have all the necessary tools, including an engine hoist, torque wrench, and alignment tools.
- Check Compatibility: Verify that the crate engine matches your vehicle’s make, model, and transmission type.
Pro Tip: Keep a detailed checklist to avoid missing any crucial steps during preparation.
2. Clean and Prep the Engine Bay
- Remove any dirt, grease, or debris from the engine bay.
- Inspect and replace worn-out engine mounts, hoses, and wiring harnesses.
- Double-check the alignment points to ensure a smooth fit during installation.
Pro Tip: A clean engine bay reduces the risk of contaminants causing damage during installation.
3. Plan the Installation Process
- Read the Manufacturer’s Manual: Follow the instructions provided with the crate engine to avoid mistakes.
- Dry Fit the Engine First: Position the engine without fully securing it to ensure proper alignment with the mounts and transmission.
- Check Bolt Threads: Ensure all bolts thread smoothly without cross-threading.
Pro Tip: Take your time during alignment to prevent misalignment issues down the road.
4. Install Supporting Components
- Attach the flywheel, clutch, or torque converter before lowering the engine into the bay.
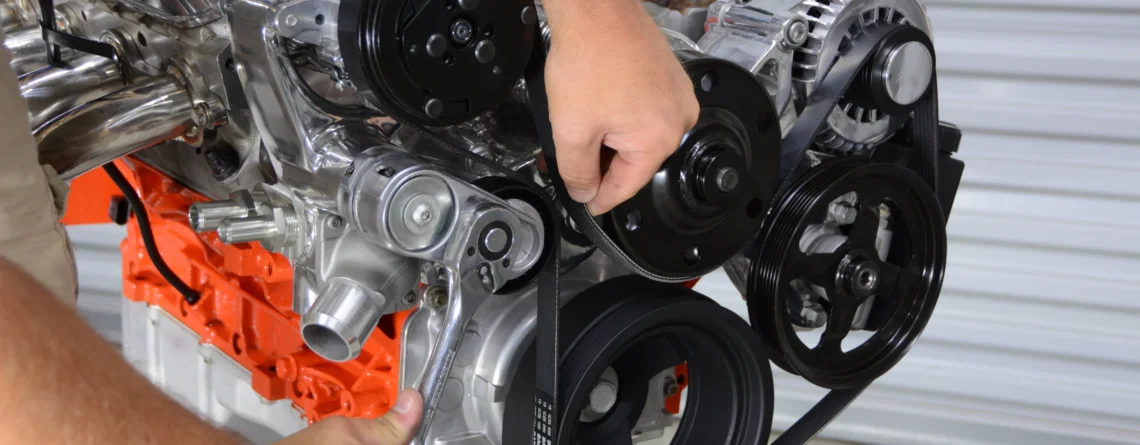
- Install the intake manifold, water pump, and alternator as per the engine specs.
- Ensure proper installation of gaskets and seals to avoid future leaks.
Pro Tip: Use fresh gaskets and apply gasket sealant where specified.
5. Double-Check Fluid Connections
- Ensure all fuel lines, coolant hoses, and oil lines are properly connected.
- Check for leaks in the fuel system, oil system, and cooling system before starting the engine.
- Fill the engine with recommended engine oil and coolant.
Pro Tip: Prime the oil system before the first start to avoid dry starts.
6. Electrical and Wiring Connections
- Carefully connect the wiring harnesses, sensors, and ignition system.
- Ensure the starter motor and alternator connections are secure.
- Verify the battery is fully charged and all grounds are clean and tight.
Pro Tip: Double-check all connections before the first startup. Loose wires can cause major issues.
7. First Startup and Break-In Process
- Prime the Engine: Before starting, ensure the engine has adequate oil pressure.
- Monitor Gauges Closely: Pay attention to oil pressure, coolant temperature, and RPM levels during startup.
- Follow Break-In Procedures: Adhere to the manufacturer’s break-in instructions to ensure optimal engine longevity.
Pro Tip: Avoid heavy loads or high RPMs during the initial break-in period.
8. Test and Tune the Engine
- After the initial run, check for leaks, unusual noises, and proper engine timing.
- Adjust the fuel mixture and ignition timing if necessary.
- Perform a short test drive to ensure smooth operation under load.
Pro Tip: Use a professional dyno tuning service for precision calibration.
9. Regular Maintenance and Follow-Up
- After the first 500 miles, change the engine oil and filter.
- Inspect belts, hoses, and fasteners for any signs of wear or loosening.
- Schedule periodic checkups to maintain peak performance.
Pro Tip: Follow the recommended maintenance intervals outlined in the engine manual.
10. Seek Professional Help if Needed
- If you’re unsure about any part of the installation process, consult a professional mechanic or technician.
- Proper installation ensures better performance, reliability, and warranty compliance.
Pro Tip: Investing in professional installation can save time and prevent costly mistakes.
✅ Final Thoughts:
Installing a mid-dress crate engine can seem daunting, but with careful preparation, attention to detail, and adherence to manufacturer guidelines, you’ll enjoy a seamless process and a powerful engine performance.
🛠️ Need Expert Advice or Premium Crate Engines?
Contact X Factors Motors Sports today for professional guidance, high-quality crate engines, and after-sales support! 🚗💨



LEAVE A COMMENT